絶対にくじけないFlutter開発環境構築(VS Code)
1. はじめに
ごめんなさい。タイトル負けしている内容なので先に謝っておきますm( )m
Flutterも大分成熟したようで正式版リリースが待ち遠しいですね。
日本でも、もう既にプロダクトに採用されている事例もあるようでアーリーアダプターではない私も手を付け始めています。
新しい言語、新しいフレームワークなどに手を付ける場合、一番つまずく可能性が高いのは入り口の部分ですよね。
そこをクリアすれば、その技術のテーストが理解でき、感覚的に前に進めるものです。
ということで、この投稿では「何も入っていない、まっさらな MacBook にFlutter開発環境を構築するまで」の軌跡を たらたら ペタペタ 記述&貼り付けしていきます。
今回使った環境: macOS High Sierra(初期インストール直後)
2. コツ?
Flutterの開発環境構築は 公式サイトの説明 及び 診断コマンド(flutter doctor) が非常に優秀で、指示されるままにコマンドを実行していれば比較的容易に開発環境構築完了まで行きつけるのでは、と思います。
「flutter doctor」コマンドは「叩くべきコマンド」や「ダウンロードすべきインストーラのあるURL」を丁寧に教えてくれます。
とはいえ、やることは段階的にいろいろあるので躓くことはあるかと。。。
基本的には、最終的に以下が抑えられればイケるはず!
- XCodeでiOSアプリがビルド&実行できる状態になっている
- Android SDKがインストールされandroidアプリがビルド&実行できる状態になっている(簡単に言うとAndroid Studio環境が整っていればOK)
- その他 Flutter が要求する諸々・・・
3. まっさらなMacにFlutter開発環境を構築するぞ!
皆さんの各環境毎に、各モジュール類がどれだけ既にインストールされているかによってやるべきことは変わってくるのですが、ここではまっさらなMac(High Sierra)に対してFlutterをインスールした作業をペタペタ貼っていきます。(なので、最短距離のインストール手順ではないです。本当に履歴をペタペタという感じ)
3.1. Flutterをダウンロード
公式サイトからzipファイルをダウンロードします。
「Get the Flutter SDK」項目の下の「flutter_macos_v0.7.3-beta.zip 」です。
3.2. Flutterのzipを解凍(配置)
ダウンロードしたzipを任意のディレクトリに解凍します。
Flutterのbin自体が含まれているので、いわゆるインストール先になります。
そういう意味で適切なディレクトリに置いてください。
ここでは公式サイトの例と同じく ~/develop に解凍します。
解凍したファイルは以下のような状態です。
$ cd ~/develop/flutter
$ ls -la

[beta]
total 168
drwxr-xr-x@ 24 daigo  staff    768  9  9 11:49 .
drwxr-xr-x  50 daigo  staff   1600  9  9 09:58 ..
-rw-r--r--@  1 daigo  staff   6148  9  9 11:51 .DS_Store
-rw-r--r--@  1 daigo  staff   6214  9  5 11:47 .cirrus.yml
drwxr-xr-x@ 14 daigo  staff    448  9  8 18:01 .git
-rw-r--r--@  1 daigo  staff    516  9  5 11:47 .gitattributes
drwxr-xr-x@  5 daigo  staff    160  9  5 11:47 .github
-rw-r--r--@  1 daigo  staff   1566  9  5 11:47 .gitignore
drwxr-xr-x@  6 daigo  staff    192  9  5 11:50 .idea
drwxr-xr-x@  4 daigo  staff    128  9  5 11:47 .pub-cache
-rw-r--r--@  1 daigo  staff   1004  9  5 11:47 AUTHORS
-rw-r--r--@  1 daigo  staff  13316  9  5 11:47 CONTRIBUTING.md
-rw-r--r--@  1 daigo  staff   1520  9  5 11:47 LICENSE
-rw-r--r--@  1 daigo  staff   1107  9  5 11:47 PATENTS
-rw-r--r--@  1 daigo  staff   6706  9  5 11:47 README.md
-rw-r--r--@  1 daigo  staff   7046  9  5 11:47 analysis_options.yaml
-rw-r--r--@  1 daigo  staff    350  9  5 11:47 appveyor.yml
drwxr-xr-x@  6 daigo  staff    192  9  5 11:47 bin
drwxr-xr-x@ 14 daigo  staff    448  9  9 11:51 dev
drwxr-xr-x@ 12 daigo  staff    384  9  5 11:47 examples
-rw-r--r--@  1 daigo  staff   1749  9  5 11:47 flutter_console.bat
-rw-r--r--@  1 daigo  staff    296  9  5 11:47 flutter_root.iml
drwxr-xr-x@ 12 daigo  staff    384  9  9 11:50 packages
-rw-r--r--@  1 daigo  staff      5  9  9 19:36 version
3.3. Flutterにパスを通す
~/.bashrcにFlutterへのパスを追記しておきます(zshの方は ~/.zshrcへ)。
~/.bashrc ファイル

export PATH=~/develop/flutter/bin:$PATH
flutterコマンドの動作確認をします。「source ~/.bashrc」するかターミナル新規オープンして、以下のコマンドを実行します。
$ flutter --version
あと、初期状態のMacだと ~/.bashrc が読み込まれない設定になっているので、その場合は以下を参考に ~/.bash_profile ファイルを記述します。
3.4. flutter doctorで診断する
flutter doctor コマンドを実行します。
「Flutter / Android toolchain / iOS / Android Studio / Connected devices」という5つのカテゴリー毎に、Flutter開発環境を構築する上で
「何が足りていないのか?」
「どうすれば解決できるのか?」
を事細かに診断してレポートしてくれます。
以下がコマンドの実行結果です。
$ flutter doctor

Building flutter tool...
Doctor summary (to see all details, run flutter doctor -v):
[✓] Flutter (Channel beta, v0.7.3, on Mac OS X 10.13.6 17G65, locale ja-JP)
[✗] Android toolchain - develop for Android devices
    ✗ Unable to locate Android SDK.
      Install Android Studio from: https://developer.android.com/studio/index.html
      On first launch it will assist you in installing the Android SDK components.
      (or visit https://flutter.io/setup/#android-setup for detailed instructions).
      If Android SDK has been installed to a custom location, set $ANDROID_HOME to that location.
[✗] iOS toolchain - develop for iOS devices
    ✗ Xcode installation is incomplete; a full installation is necessary for iOS development.
      Download at: https://developer.apple.com/xcode/download/
      Or install Xcode via the App Store.
      Once installed, run:
        sudo xcode-select --switch /Applications/Xcode.app/Contents/Developer
    ✗ Brew not installed; use this to install tools for iOS device development.
      Download brew at https://brew.sh/.
[✗] Android Studio (not installed)
[!] Connected devices
    ! No devices available

! Doctor found issues in 4 categories.
よく見ると「具体的に実行すべきコマンド」「ダウンロードすべき物のURL」がすべて出力されています。
ということで指摘された問題点を順番に解決していきます。
3.5. gitも入ってないとこれも言われるかも・・・
gitも入っていないと思うので、たしか以下の画面が出てくるかも(この点、記憶が曖昧・・・)。

↑が出たら、インストールボタンを押してgitをインストールします。
3.6. Android toolchainの問題を解決
「Android SDKないよ。Android Studioを https://developer.android.com/studio/index.html からダウンロードしてインストールして。一回起動すればSDKコンポーネントのインストールをサポートしてくれるよ。」と言っています。
支持に従ってAndroid Studioをダウンロード&インストールします。

支持に従ってインストールして、新規にプロジェクト(MyApplication)を作成すると、以下のような画面になるかと。
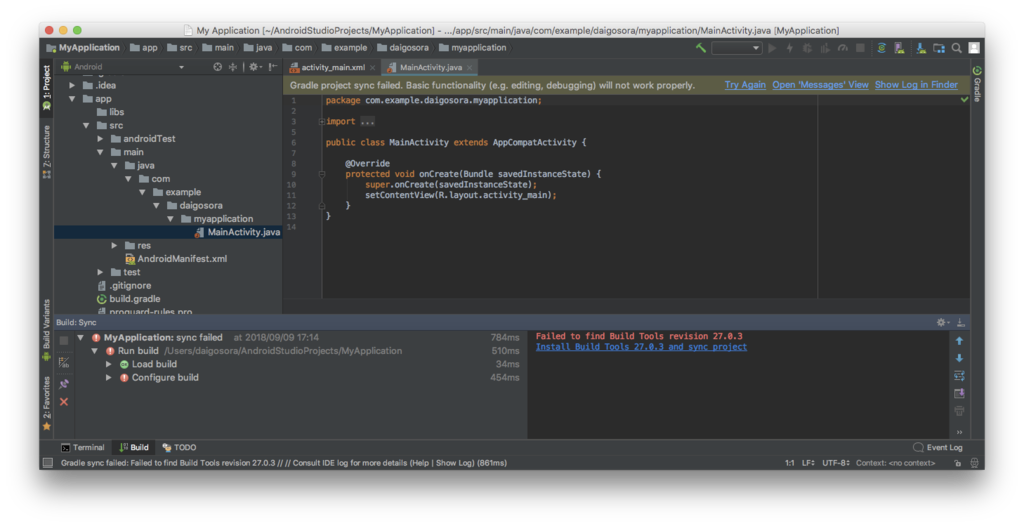
右上に「Gradle project sync failed...」と表示され、右下に「Failed to find Tools revisions 27.0.3」と表示されています。
すぐ下の「Install BuildTools 27.0.3 and sync project」(青い文字)をクリックして、不足しているツールをインストールします。
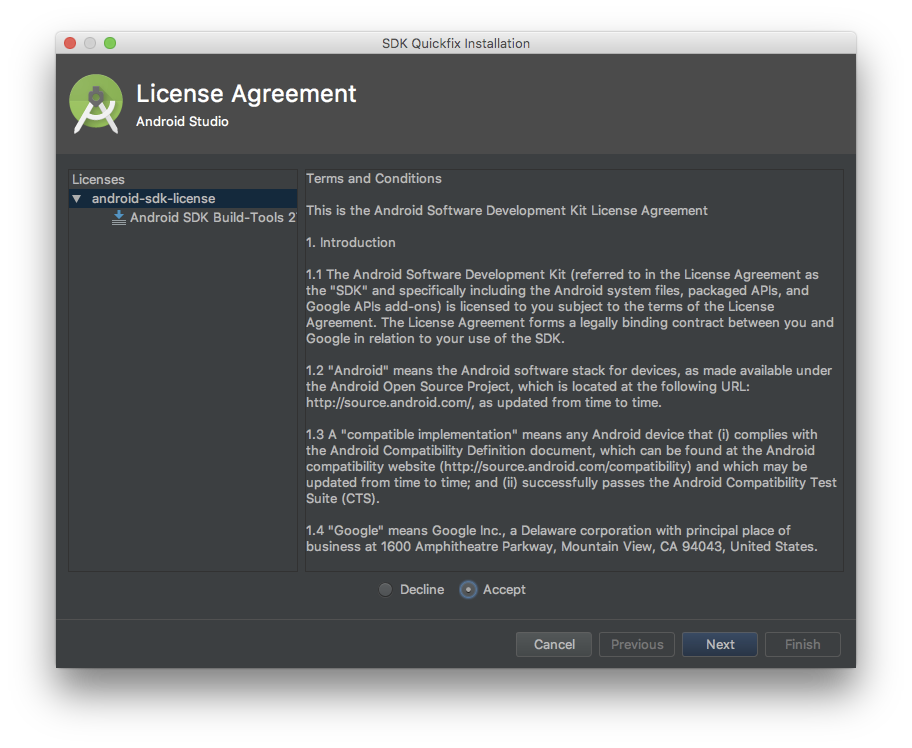
で、実行します(緑の▶ボタン)。
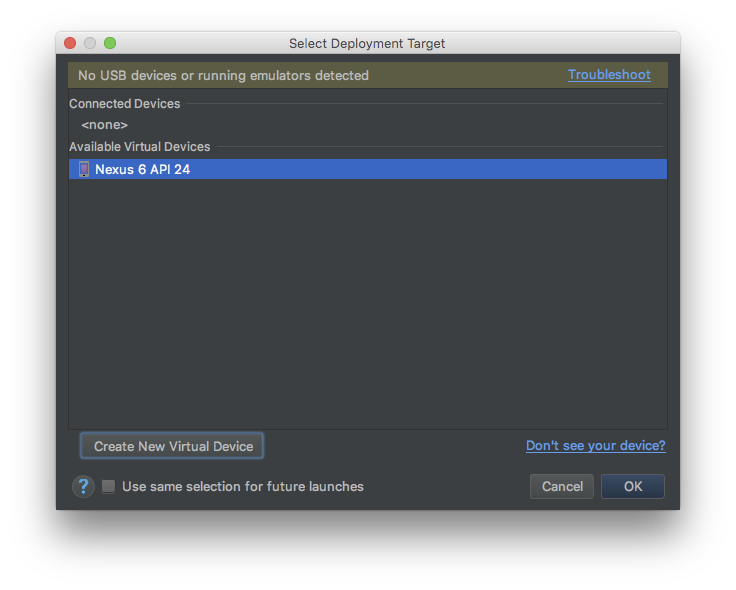
どのデバイスで実行するかの選択画面が表示されます。
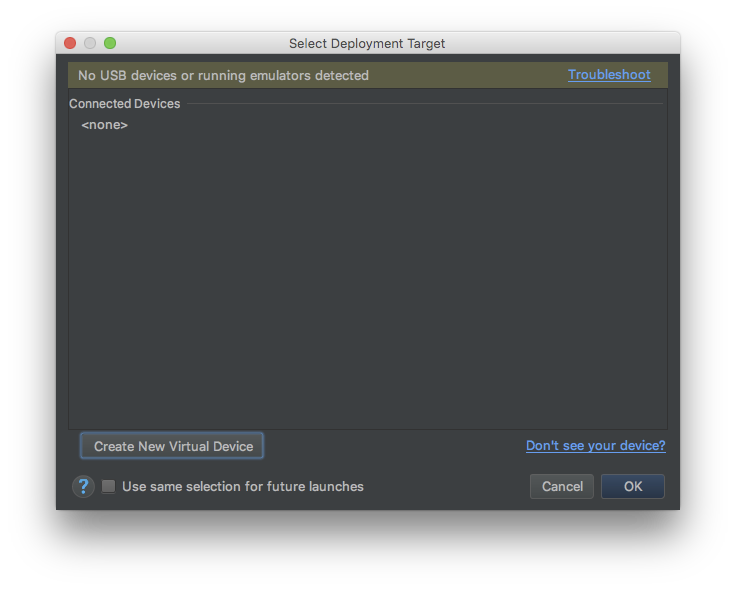
物理デバイス繋いでないし、emulatorも作ってないので、左下の「Create New Virtual Device」をクリックします。
適当にNexus6にして
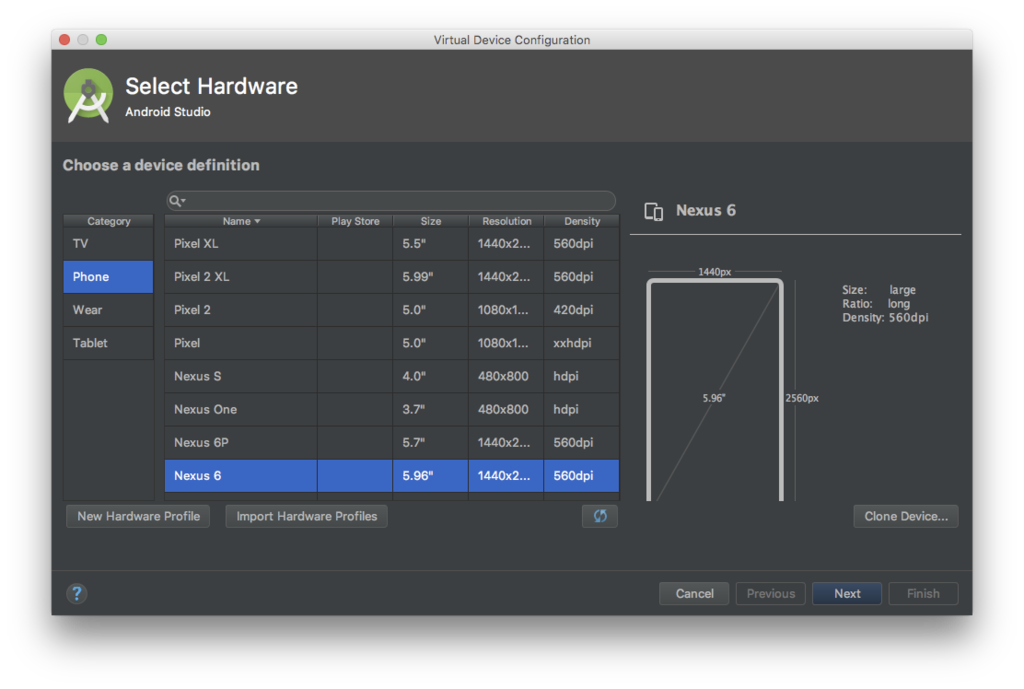
Nougat x86をダウンロードして、、、Finish。
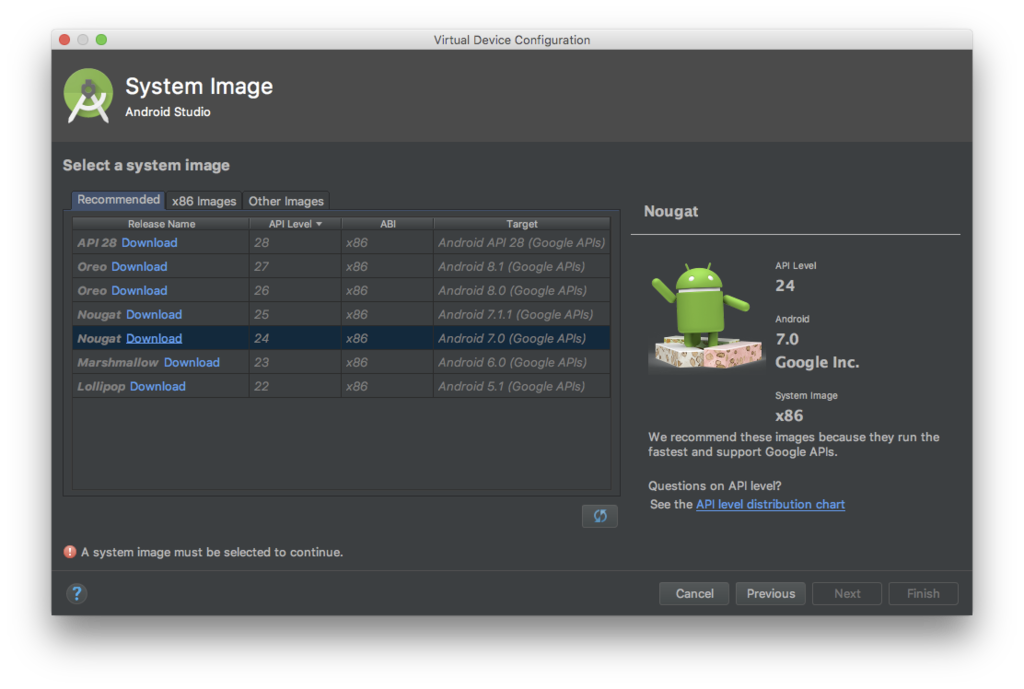
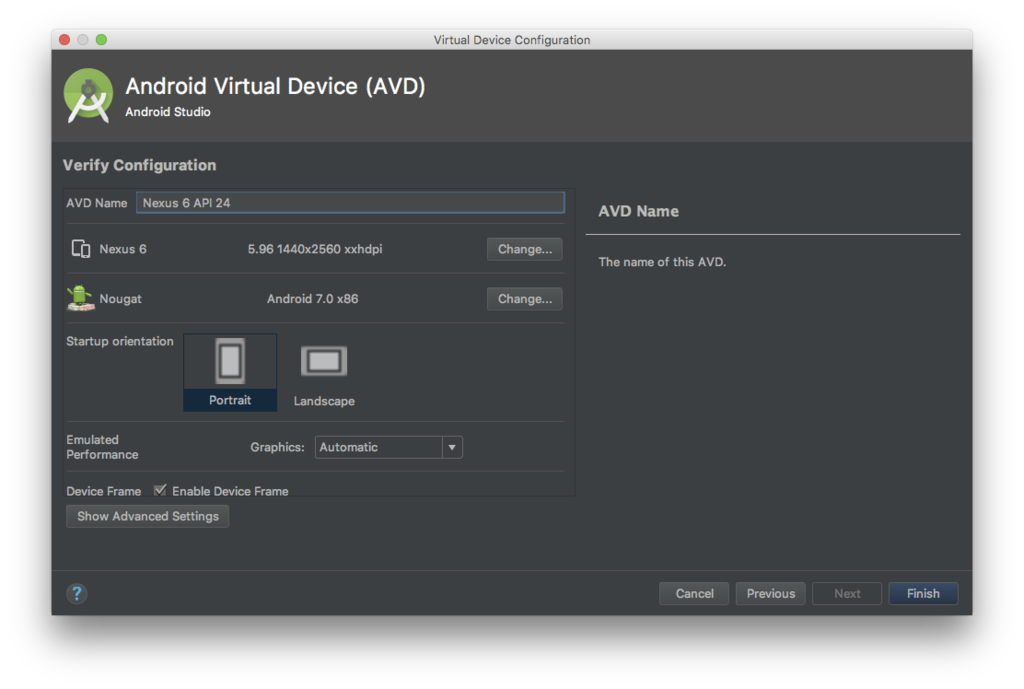
出来たっぽい。

作ったemulatorを選択してOK。
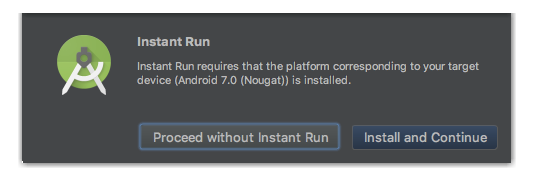
「Instant Run」のインストールを促される。要らないと思うけど、ここでは一応入れました。
動いた!

いい感じにAndroid開発環境が出来たっぽいので、もう一回 flutter doctor してみる。
$ flutter doctor

Doctor summary (to see all details, run flutter doctor -v):

[✓] Flutter (Channel beta, v0.7.3, on Mac OS X 10.13.6 17G65, locale ja-JP)
[!] Android toolchain - develop for Android devices (Android SDK 28.0.2)
    ! Some Android licenses not accepted.  To resolve this, run: flutter doctor --android-licenses
[✗] iOS toolchain - develop for iOS devices
    ✗ Xcode installation is incomplete; a full installation is necessary for iOS development.
      Download at: https://developer.apple.com/xcode/download/
      Or install Xcode via the App Store.
      Once installed, run:
        sudo xcode-select --switch /Applications/Xcode.app/Contents/Developer
    ✗ Brew not installed; use this to install tools for iOS device development.
      Download brew at https://brew.sh/.
[✓] Android Studio (version 3.1)
    ✗ Flutter plugin not installed; this adds Flutter specific functionality.
    ✗ Dart plugin not installed; this adds Dart specific functionality.
[!] Connected devices
    ! No devices available

! Doctor found issues in 3 categories.
Androidは、まだダメ出しされました。→「Some Android licenses not accepted.」
実行すべきコマンドの指示も出ているので、素直に実行。
$ flutter doctor --android-licenses

Warning: File /Users/daigosora/.android/repositories.cfg could not be loaded.

5 of 6 SDK package licenses not accepted. 100% Computing updates...

Review licenses that have not been accepted (y/N)? y

・・・省略・・・こんな感じで accepted y/N を何回か聞かれるので yエンター、yエンターする(ちゃんと読んで承諾してね)。
しつこいけど、ここで flutter doctor すると以下のようにAndroid toolchainがOKとなります。
$ flutter doctor

[✓] Flutter (Channel beta, v0.7.3, on Mac OS X 10.13.6 17G65, locale ja-JP)
[✓] Android toolchain - develop for Android devices (Android SDK 28.0.2)
[✗] iOS toolchain - develop for iOS devices
    ✗ Xcode installation is incomplete; a full installation is necessary for iOS development.
      Download at: https://developer.apple.com/xcode/download/
      Or install Xcode via the App Store.
      Once installed, run:
        sudo xcode-select --switch /Applications/Xcode.app/Contents/Developer
    ✗ Brew not installed; use this to install tools for iOS device development.
      Download brew at https://brew.sh/.
[✓] Android Studio (version 3.1)
    ✗ Flutter plugin not installed; this adds Flutter specific functionality.
    ✗ Dart plugin not installed; this adds Dart specific functionality.
[!] Connected devices
    ! No devices available

! Doctor found issues in 2 categories.
3.7. iOS toolchainの問題を解決
次はiOSの問題の解決を。
doctorは、「XCodeをインストールして!ダウンロードするかAppストアからインストールしてね」と言っているので、Appストアを開きXCodeをインストールします。
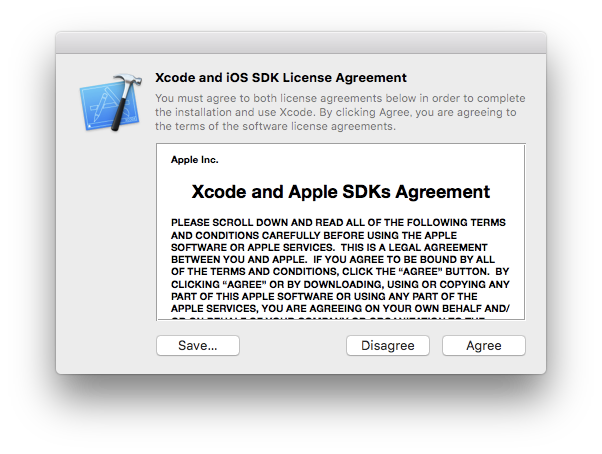
指示ではインストール後に「sudo xcode-select --switch 」しろと書いてあるけど、ここではXCode起動していOSアプリがSimulatorで動くことを確認します(コマンドじゃなくて、これでもOK)。
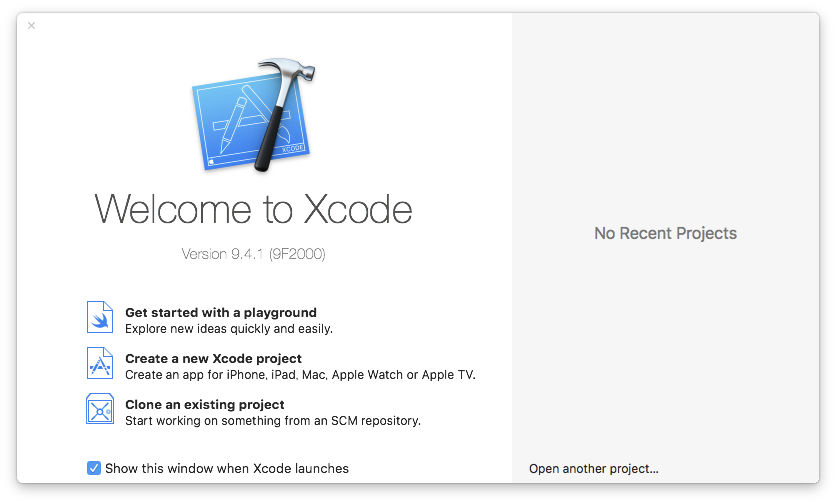
XCodeを起動します。
「Create a new Xcode project」をクリックします。
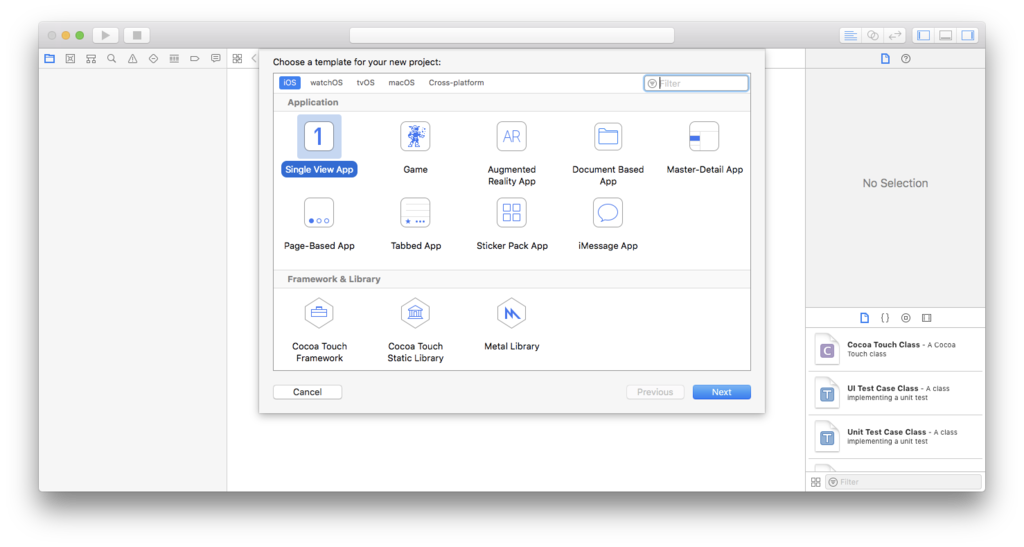
とりあえず「Single View App」を選択。
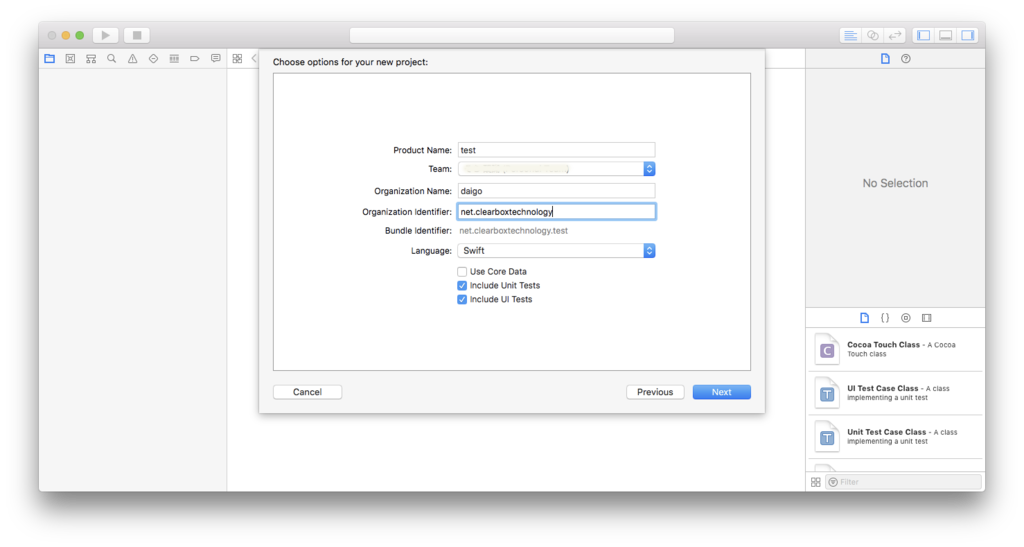
こんな設定で。
そのまま実行します(▶ボタンクリック)。

OK!!(XCodeのSimple View Appはで生成したアプリはラベルも何もない状態なので分かりにくいけど真っ白な画面が正常状態です)
(1) brewをインストール
そうそう、もう1つ指摘されていました。
「Brew not installe」
初期状態Macから始めているのでbrewも入っていません。
指示された「https://brew.sh/」をブラウザで開くと、brewインストールコマンドが表示されるます。
そのコマンドをそのままターミナルにコピー&Enterします。
$ /usr/bin/ruby -e "$(curl -fsSL https://raw.githubusercontent.com/Homebrew/install/master/install)"
(2) 再度 flutter doctor
再度、flutter doctor してみます。
$ flutter doctor

Doctor summary (to see all details, run flutter doctor -v):
[✓] Flutter (Channel beta, v0.7.3, on Mac OS X 10.13.6 17G65, locale ja-JP)
[✓] Android toolchain - develop for Android devices (Android SDK 28.0.2)
[!] iOS toolchain - develop for iOS devices (Xcode 9.4.1)
    ✗ libimobiledevice and ideviceinstaller are not installed. To install, run:
        brew install --HEAD libimobiledevice
        brew install ideviceinstaller
    ✗ ios-deploy not installed. To install:
        brew install ios-deploy
    ✗ CocoaPods not installed.
        CocoaPods is used to retrieve the iOS platform side's plugin code that responds to your plugin usage on the Dart side.
        Without resolving iOS dependencies with CocoaPods, plugins will not work on iOS.
        For more info, see https://flutter.io/platform-plugins
      To install:
        brew install cocoapods
        pod setup
[✓] Android Studio (version 3.1)
    ✗ Flutter plugin not installed; this adds Flutter specific functionality.
    ✗ Dart plugin not installed; this adds Dart specific functionality.
[!] Connected devices
    ! No devices available

! Doctor found issues in 2 categories.
iOS toolchain はまだクリアしませんねー。
まあ、実行すべきコマンドは丁寧に指示してくれています。
これらは単純にターミナルにコピーして実行するだけです。
$ brew install --HEAD libimobiledevice
...
$ brew install ideviceinstaller
...
$ brew install ios-deploy
...
$ brew install cocoapods
...
$ pod setup
3.8. 結構いい感じのはず。再度 flutter doctor
しつこいけど 再度 flutter doctor を実行してみます。
$ flutter doctor

Doctor summary (to see all details, run flutter doctor -v):
[✓] Flutter (Channel beta, v0.7.3, on Mac OS X 10.13.6 17G65, locale ja-JP)
[✓] Android toolchain - develop for Android devices (Android SDK 28.0.2)
[✓] iOS toolchain - develop for iOS devices (Xcode 9.4.1)
[✓] Android Studio (version 3.1)
    ✗ Flutter plugin not installed; this adds Flutter specific functionality.
    ✗ Dart plugin not installed; this adds Dart specific functionality.
[!] Connected devices
    ! No devices available

! Doctor found issues in 1 category.
いい感じですね。
Android Studioに関してはFlutterプラグインが入ってないと言われてますが、私はエディタ(IDE)としてVisual Studio Codeを使うつもりなのでこれは無視して構いません。Android StudioでFlutter開発を行うつもりならプラグインをインストールする必要があります。
「Connected devices」については、この段階では、実機を接続していない+emulator/simulatorも起動していないので、No devices availableと表示されているだけです。
Android Studioセットアップ時にAndroidアプリがemulatorで起動することは確認していますし、iOSについても同様にXCodeで作成したiOSアプリがSimulatorで動作するのを確認済みなのでこの点は問題ありません。
4. Visual Studio Codeをインストール
ここでは、Flutter開発のエディタ(IDE)としてVisual Studio Codeを利用します。
ということでVS Codeをダウンロード&インストール!
上記から、zipファイルをダウンロードし、解凍したアプリを「アプリケーション」にヒョイって持っていく感じでインストールします。
4.1. Flutter拡張機能(プラグイン)をインストール

「Flutter」で検索。そのまま「Flutter」という名前の拡張機能が出てくるので、インストールします。VS Codeは再起動させます。

これで、開発環境構築完了です!!
5. Hello Flutterを作ってみる
では、Hello Flutterプロジェクトを作成して iOS / Android で動作するのか試してみましょう。
ターミナルを開き、プロジェクトを作成したい任意のディレクトリに移動します。
ここでは ~/workspace としました。(go 1.10みたいに環境ディレクトリ縛りは無いのでご自由な場所で)
ディレクトリを作って。
$ cd ~/
$ mkdir workspace
$ cd workspace
$ pwd

/Users/daigo/workspace
「flutter create 【プロジェクト名】」コマンドでFlutterアプリの雛形が作成されます。
$ flutter create helloflutter

Creating project helloflutter...

  helloflutter/ios/Runner.xcworkspace/contents.xcworkspacedata (created)

  helloflutter/ios/Runner/Info.plist (created)

...省略...

Wrote 65 files.

[✓] Flutter is fully installed. (Channel beta, v0.7.3, on Mac OS X 10.13.6 17G65, locale ja-JP)
[✓] Android toolchain - develop for Android devices is fully installed. (Android SDK 28.0.2)
[✓] iOS toolchain - develop for iOS devices is fully installed. (Xcode 9.4.1)
[✓] Android Studio is fully installed. (version 3.1)
[!] Connected devices is partially installed; more components are available.

Run "flutter doctor" for information about installing additional components.

All done! In order to run your application, type:
  $ cd helloflutter
  $ flutter run
Your main program file is lib/main.dart in the helloflutter directory.
5.1. Visual Studio Codeで開く
「ファイル→開く」で「~/workspace/helloflutter」を開きます。
./lib/main.dart ファイルがアプリのメインコード(エントリーポイント)になります。
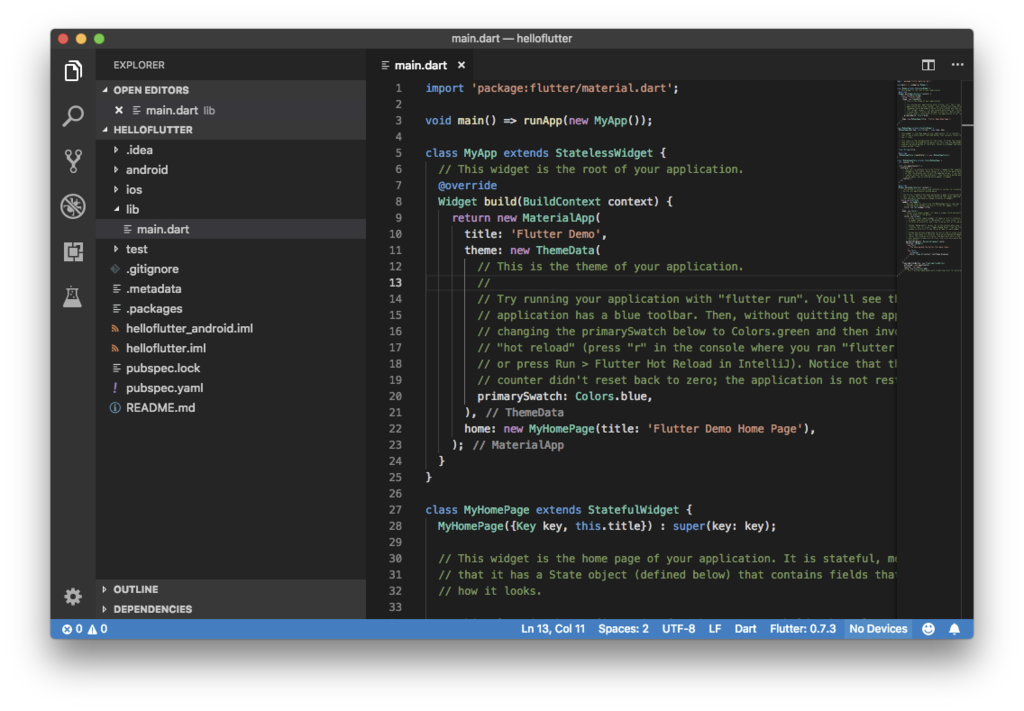
ステータスバー(下の水色のバー)の右の方に No Devices と表示されているので、クリックします。 すると、上のコマンドパレットに、事前に作成済みの「Nexus 6」と「iOS Simulator」が表示されます。
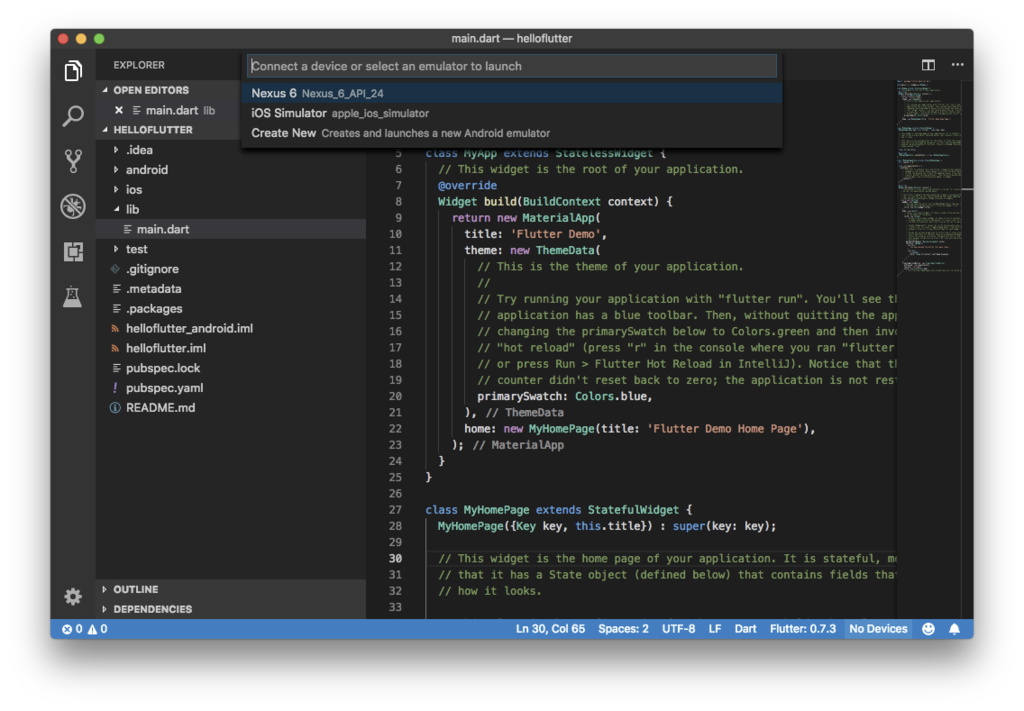
まず「iOS Simulator」を選択します。するとiOS Simulatorが起動してきます。
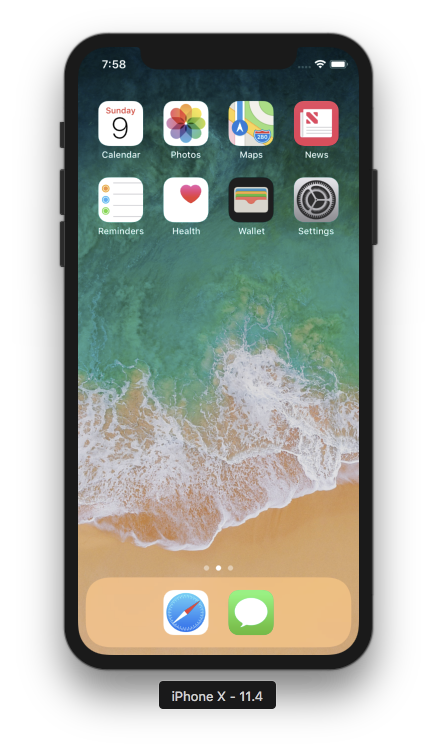
続けてVS Codeメニュー「デバッグ→デバッグの開始」を選択します(もしくはF5クリック)。
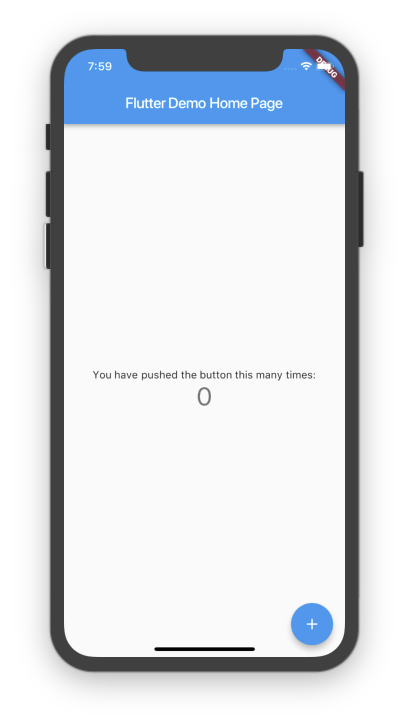
サンプルが起動しました。
VS Code上部の、「赤い■ボタン」を押すとデバッグが終了します。
次にステータスバー右の「iPhone X(iosSimulator)」をクリックし、「Nexus 6」を選択します(表示されないときは、一旦 iOS Simulator を終了してみてください。もしくはAndroid Emulatorを事前に起動しておいてください)。
するとAndroid Emulatorが起動してきます。
VS Codeメニュー「デバッグ→デバッグの開始」を選択します(もしくはF5クリック)。
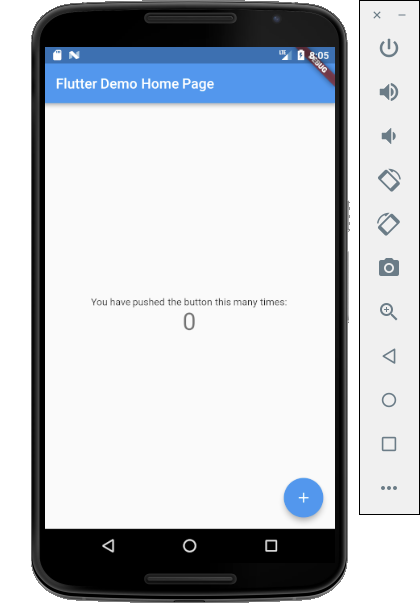
androidでも無事に実行出来ました!
ブレークポイントもHot Reloadも効くよ
この状態で、
Visual Studio Codeでブレークポイントを付ければもちろん止まります。
更にデバッグ実行状態でコードを修正して保存すれば「Hot Reload」も動作します(コード修正が即座に実行中アプリに反映)。
6. まとめ
ということで、必要以上に(?)長々とFlutter開発環境構築手順について書いてきました。
皆さんの環境毎に追加でインストールすべきモジュールは異なります。
それらは親切にFlutter doctorが教えてくれもします。
本投稿では、まっさらなMac環境からFlutter開発環境を構築するまでの手順(というか軌跡というか?)をまとめました。
ここに記述させていただいた内容で、何かに躓いてしまった方の助けになる情報が1つでもあれば幸いです。